Install Raspberry Pi OS using system tools on OS X
06 Jan 2016You don’t need special tools in OS X to get started with the Raspberry Pi. The system tools will do the job of flashing a Raspberry Pi operating system to an SD card without any hassle.
Step by step guide:
1. Download the Raspberry Pi OS image of you choice.
2. Connect your SD card to your computer. I use the SD card reader in my laptop.
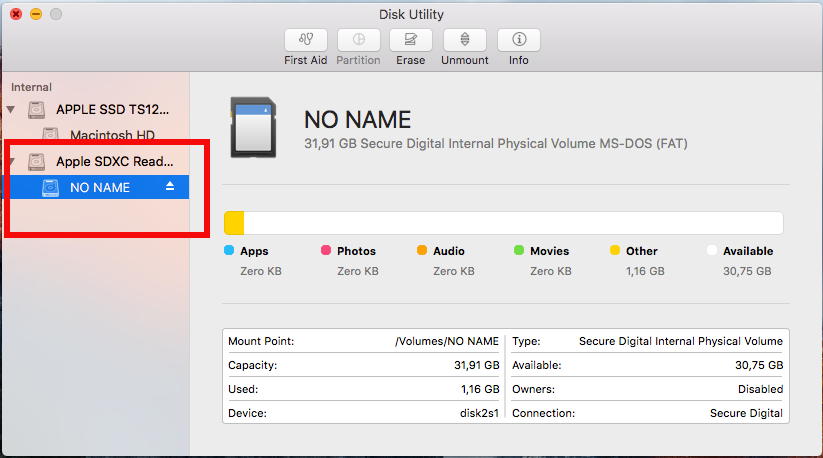
3. Open Disk Utility and locate the SD card:
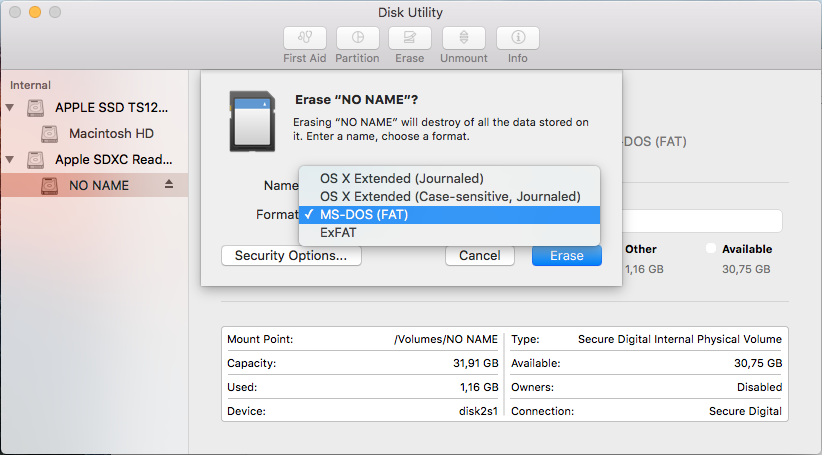
4. The SD card must use the FAT32 file system. You can format the SD card by clicking the “Erase” button in Disk Utility and selecting the MS-DOS(FAT) file system:
5. Open a terminal and run the following command:
diskutil list
This will list all the disk partitions on your file system:
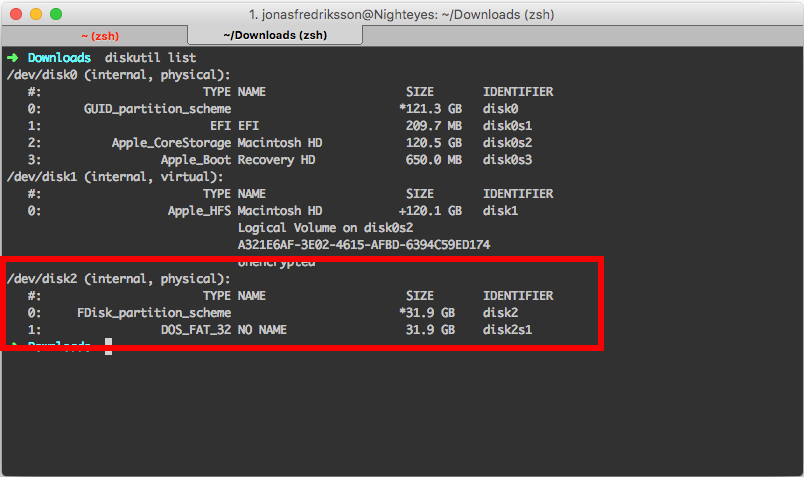
Find the SD card disk, it will be called /dev/disk<some number> in my case it is /dev/disk2
6. Unmount the SD card partition so that it can be overwritten by running the following command:
diskutil unmountDisk /dev/disk<some number>
In my case:
diskutil unmountDisk /dev/disk2
7. Copy the OS image to the SD card by running the following command:
sudo dd bs=1m if=<path to OS image file> of=/dev/disk<partion number>
In my case:
sudo dd bs=1m if=ubuntu-mate-15.10.1-desktop-armhf-raspberry-pi-2.img of=/dev/disk2
This command will run for some time without any feedback. When it completes it will print something like this:
    501+1 records in
    501+1 records out
    526260224 bytes transferred in 293.988535 secs (1790071 bytes/sec)
8. Plug the SD card into you Raspberry Pi and let the fun begin.
This will currently not work on Windows 10 IoT Core which requires Windows specific tools.